


Creating product templates in Printseekers can significantly streamline your order fulfillment process. Product templates come with pre-filled information fields, allowing you to submit new orders quickly in the future. You can customize these templates by adding all the details or just a few—it's entirely up to you!
Why Do I Need a Product Template?
Product templates are incredibly useful for creating future products much faster. If you offer multiple similar products, you can use a template and simply edit the few unique parameters of the specific product. This saves you time and effort, allowing for a more efficient workflow.
How Detailed Should the Template Be?
A product template has required and optional fields, giving you some flexibility. Even if you fill out only a few basic details, it will save you much time! The more similar your products are, the more fields you should fill out to maximize efficiency.
Step 1: Log into Your Printseekers Account
- Access the fulfillment system: Open your web browser and navigate to Printseekers fulfillment system.
- Enter Your Credentials: Log in using Facebook / Google or Input your e-mail address and password, then click "Log In."
- Check Your Profile: Ensure your billing and profile information are correctly entered and set up.
Step 2: Go to “Product Templates” on Your Left Menu
- Navigate to the Menu: Locate the menu on the left-hand side of your dashboard.
- Select “Product Templates”: Click on the “Product Templates” section to access the template creation area.

Step 3: Click the “Create Template” Button
- Initiate Template Creation: Click the “Create Template” button to create a new product template.
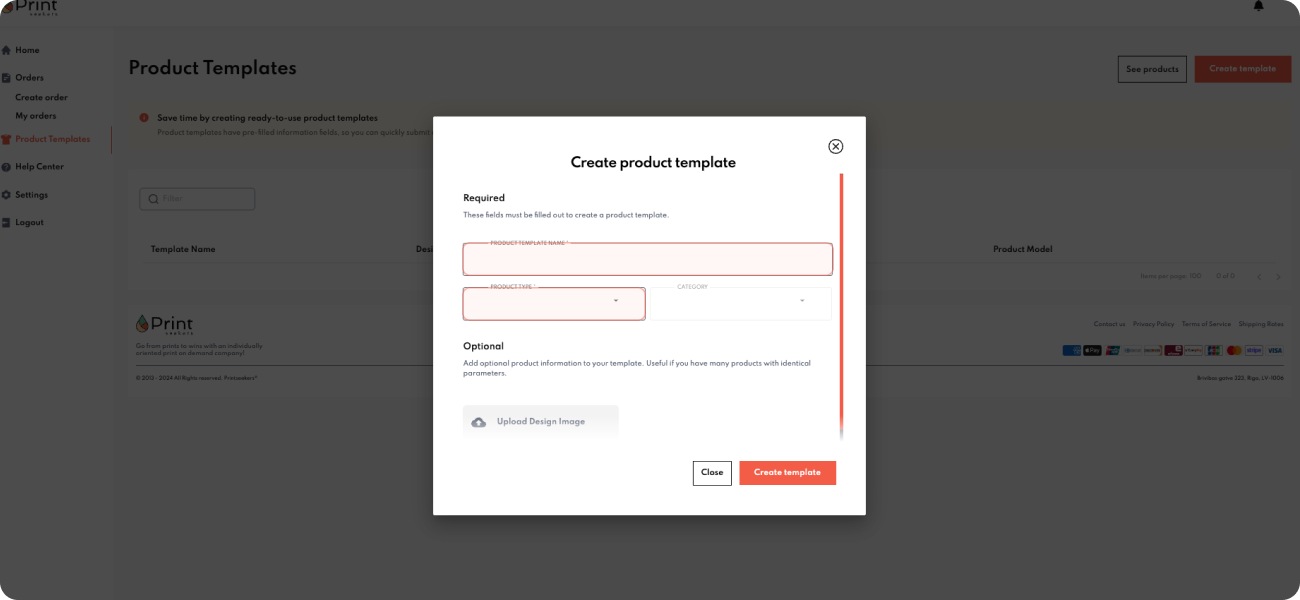
Step 4: Enter Your Template Name
- Name Your Template: Provide a unique and descriptive name to identify it later quickly.
Step 5: Choose Your Product and Product Category
- Select Product: Choose the product you want to create a template from the available options.
- Select Product Category: Choose the appropriate product category that best fits your product.

Step 6: Fill Out the Rest of the Information
- Enter Product Details: Fill out the required and optional information fields depending on your chosen product. The more details you provide, the more streamlined your future order submissions will be.
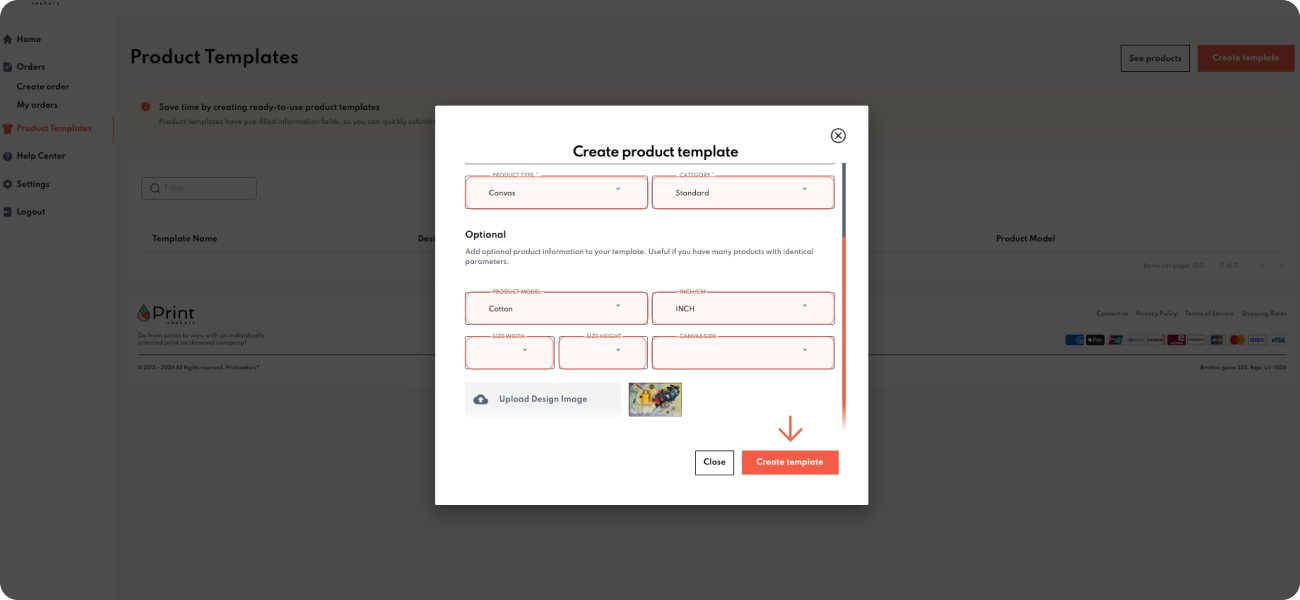
Step 7: Create Template
- Finalize the Template: Once all necessary information is filled out, click the “Create Template” button to save your new product template.

Following these steps, you can create detailed product templates that save time and effort in future order submissions. Please contact our customer support team if you have any questions or need further assistance. Thank you for choosing Printseekers for your print-on-demand needs!


.png)
.png)
